
How To Set Up Your Nameservers On Separate VPS's (Centos Web Panel)
Posted by The Curious Website Designer | Posted on Sat 29 Dec 2018

I have two seperate VPS server setups each with one public ip address. One is my main production server and the other is used as an offsite disaster backup.
In this article, I will show you how I set up the DNS server so that ns1 is on the production server, ns2 is on the backup server and how I keep the DNS information synchronised.
Here are the details of the two servers I will be setting up:
| Primary Server | Secondary Server |
|---|---|
|
IP Address: 91.238.164.188 Hostname: svr1.mynewdomain.co.uk Nameservers:
Domains:
|
IP Address: 80.211.112.201 Hostname: svr2.mynewdomain.co.uk Nameservers:
Domains:
|
For the purposes of this article, I am assuming you have already installed Centos Web Panel on your main or primary server.
Step 1. Configure The Primary Server.
Looking at my primary server, these are the DNS zones that have been set up (from the left menu select DNS Functions > List DNS Zones):
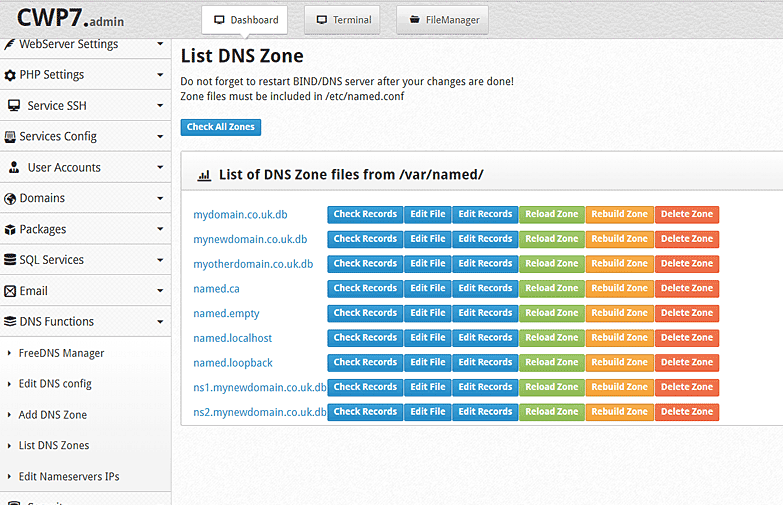
As both the primary and secondary servers are going to be set up as sub domains of the Top Level Domain mynewdomain.com, we're going to edit the dns zone for mynewdomain.com.
Click on the Edit File button for mynewdomain.co.uk.db. You will see a record along the lines of:
- ; Generated by CWP
- ; Zone file for mynewdomain.co.uk
- $TTL 14400
- mynewdomain.co.uk. 86400 IN SOA ns1.mynewdomain.co.uk. email.gmail.com. (
- 2013071600 ; serial, todays date+todays
- 86400 ; refresh, seconds
- 7200 ; retry, seconds
- 3600000 ; expire, seconds
- 86400 ) ; minimum, seconds
- mynewdomain.co.uk. 86400 IN NS ns1.mynewdomain.co.uk.
- mynewdomain.co.uk. 86400 IN NS ns2.mynewdomain.co.uk.
- mynewdomain.co.uk. IN A 91.238.164.188
- localhost.mynewdomain.co.uk. IN A 127.0.0.1
- mynewdomain.co.uk. IN MX 0 mynewdomain.co.uk.
- mail IN CNAME mynewdomain.co.uk.
- www IN CNAME mynewdomain.co.uk.
- ftp IN CNAME mynewdomain.co.uk.
- ; Add additional settings below this line
- _dmarc 14400 IN TXT "v=DMARC1; p=none"
To the end of this file, we're going to add the following lines:
- ns1 14400 IN A 91.238.164.188
- ns2 14400 IN A 80.211.112.201
- svr1 14400 IN A 91.238.164.188
- svr2 14400 IN A 80.211.112.201
This adds the hostname and nameserver subdomains that we need to the DNS zone. Note the ip addresses associated with each subdomain - ns1 and svr1 are the primary server and ns2 and svr 2 go to the secondary server.
We're also going to add one other line to the file:
- backup 14400 IN A 80.211.112.201
This will direct any web enquiries for backup.mynewdomain.co.uk to our secondary server.
The resulting file should look like this:
- ; Generated by CWP
- ; Zone file for mynewdomain.co.uk
- $TTL 14400
- mynewdomain.co.uk. 86400 IN SOA ns1.mynewdomain.co.uk. email.gmail.com. (
- 2013071600 ; serial, todays date+todays
- 86400 ; refresh, seconds
- 7200 ; retry, seconds
- 3600000 ; expire, seconds
- 86400 ) ; minimum, seconds
- mynewdomain.co.uk. 86400 IN NS ns1.mynewdomain.co.uk.
- mynewdomain.co.uk. 86400 IN NS ns2.mynewdomain.co.uk.
- mynewdomain.co.uk. IN A 91.238.164.188
- localhost.mynewdomain.co.uk. IN A 127.0.0.1
- mynewdomain.co.uk. IN MX 0 mynewdomain.co.uk.
- mail IN CNAME mynewdomain.co.uk.
- www IN CNAME mynewdomain.co.uk.
- ftp IN CNAME mynewdomain.co.uk.
- ; Add additional settings below this line
- _dmarc 14400 IN TXT "v=DMARC1; p=none"
- ns1 14400 IN A 91.238.164.188
- ns2 14400 IN A 80.211.112.201
- svr1 14400 IN A 91.238.164.188
- svr2 14400 IN A 80.211.112.201
- backup 14400 IN A 80.211.112.201
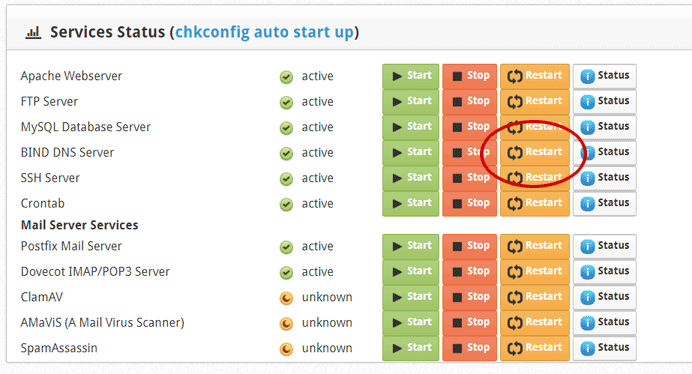
Save the file and restart the Bind DNS Server (from the webpanel dashboard):
Step 2. Basic Configuration of The Secondary Server
- Make sure the hostname of the server is svr2.mynewdomain.co.uk
- Set up the nameservers to be ns1.mynewdomain.co.uk and ns2.mynewdomain.co.uk
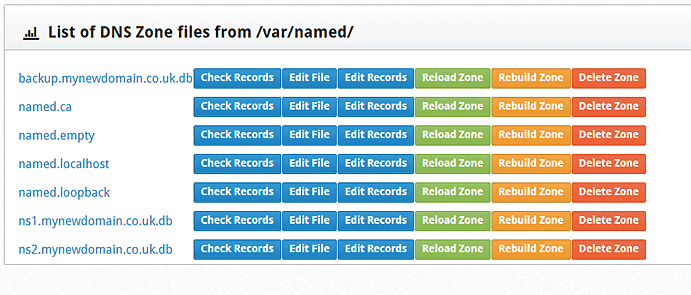
- Create a new user account for backup.mynewdomain.co.uk
Use your own domain details instead of those I've used here of course.
Step3. Synchronise The DNS Zones Across Both Servers
Next we're going to create a script that:
- copies the zone files from svr1 to svr2
- checks whether the DNS server configuration file is set up to load the zone file and update it where the file reference is missing
- restarts the DNS server on svr2
We will then set up a CRON job to run this process every 30 minutes so that the DNS zones are synchronised within 30 minutes of any of the zones on svr1 being updated.
#The Script
The script will reside on svr2 and will first of all copy the DNS zone files from svr1:
- $remote = 'root@91.238.164.188';
- exec('scp -P4567 ' . $remote . ':/var/named/*.db /var/named/');
The first line sets the variable $remote to contain the address of user root on svr1.
The second line performs the file copy using 'scp'. The syntax is copy using port 4567 from 'root@91.238.164.188:/var/named/*' to the folder '/var/named/' on this (svr2) server. You would need to change the value of $remote on your server.
Next, the script checks and, if necessary, updates the DNS Server configuration file (/etc/named.conf).
- $files = scandir('/var/named/');
- $conf = file_get_contents('/etc/named.conf');
- foreach($files as $file)
- if(substr($file, -3) == '.db') {
- if(strpos($conf, '/var/named/' . $file) === false) {
- $domain = substr($file, 0, -3);
- $fp = fopen('/etc/named.conf', 'a');
- fwrite($fp, " ");
- fwrite($fp, '// zone ' . $domain . " ");
- fwrite($fp, 'zone "' . $domain . '" {' . " ");
- fwrite($fp, ' type master;' . " ");
- fwrite($fp, ' file "/var/named/' . $file . '";};' . " ");
- fwrite($fp, '// zone_end ' . $domain . " ");
- }
- }
- }
Line 1 puts the file names in the folder '/var/named/' into an array $files (the zone files).
Line 2 puts the contents of the DNS server configuration file into a variable for comparison with the filenames in $files
Line 3 loops through all the zone filenames
Line 4 checks that the filename is a zone file (ie ends in .db). If not, it skips lines 5 - 14.
Line 5 checks the DNS server configuration file for a reference to the zone file. If there is no reference, lines 6 - 13 append the correctly formatted reference to the file.
Finally, the DNS server is restarted:
- exec('systemctl restart named.service');
This is what the final file looks like:
- <?php
- // ns2_sync.php
- // * copies all of the .db files from svr1 (ns1) to svr2 (ns2)
- // * updates named.conf if there is not an entry corresponding to the .db file
- // Copy DNS Zone Files from svr1 to svr2 *** EDIT THE NEXT LINE TO REFLECT THE CORRECT IP ADDRESS ***
- $remote = 'root@217.61.22.130';
- exec('scp -P47255 ' . $remote . ':/var/named/*.db /var/named/');
- // Check & update named.conf
- $files = scandir('/var/named/');
- $conf = file_get_contents('/etc/named.conf');
- foreach($files as $file) {
- if(substr($file, -3) == '.db' && $file != 'co.uk.db') {
- if(strpos($conf, '/var/named/' . $file) === false) {
- $domain = substr($file, 0, -3);
- $fp = fopen('/etc/named.conf', 'a');
- fwrite($fp, " ");
- fwrite($fp, '// zone ' . $domain . " ");
- fwrite($fp, 'zone "' . $domain . '" {' . " ");
- fwrite($fp, ' type master;' . " ");
- fwrite($fp, ' file "/var/named/' . $file . '";};' . " ");
- fwrite($fp, '// zone_end ' . $domain . " ");
- }
- }
- }
- exec('systemctl restart named.service');
- ?>
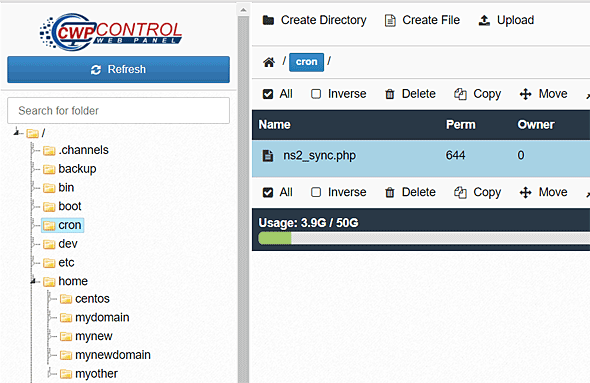
Save the file as 'ns2_sync.php' and upload it to a new folder '/cron/'
#Setup SCP.
If you're not familiar with using Secure Copy (scp), checkout this article: How To Use Secure Copy (SCP) To Copy Files From One Server To Another.
The main points to bear in mind are:
- Copy the contents of the file '/root/.ssh/id_rsa.pub' on the Primary server to the file '/root/.ssh/authorized_keys' on the Secondary server, adding the content at the end of the file if it already exists.
- Make sure to add the IP address of the 'other' server to the firewall whitelist on both servers.
- If you have setup the SSH configuration file (/etc/ssh/sshd_config) so that PermitRootLogin is no, this needs to be changed to without-password
You can check the file is working correctly by logging in to the Secondary server (svr2) via PuTTY, using su to become thr root user and entering:
The '-vvv' means that debug data is output to the console so you can establish where the script is going wrong if it fails.
#Set Up The CRON Job
Once you know that the script works correctly, all that needs to be done is set the CRON Job so it all happens in the background without you having to manually update the secondary server.
In the Control Panel for svr2 go to Server Settings > Crontab for root. Find the section at the bottom of the page Add Full Custom Cron Jobs and enter:
Then save the changes.
This will set the Cron job to run at 7 minutes and 37 minutes past the hour, every hour every day.
You can find out more about Cron Jobs here: https://code.tutsplus.com/tutorials/scheduling-tasks-with-cron-jobs--net-8800
Related Articles
How To Use Secure Copy (SCP) To Copy Files From One Server To Another
 To Copy Files From One Server To Another")
Posted by: The Curious Website Designer
on Mon 11 Jun 2018
This article shows how to remotely copy backup files from one server to another using 'Secure Copy' (SCP) and without having to manually enter a password each time. I will write another article in a few weeks time to show how I generate my backup files.
Tags: dns, nameserver, nameservers