
How To Migrate a User From cPanel To Centos Web Panel
Posted by The Curious Website Designer | Posted on Sat 15 Apr 2017

So, you've finally got your VPS set up and Centos Web Panel is installed and ready to go - you're now faced with transferring over all of your user accounts from cPanel. CWP comes with a bundled cPanel migration tool which does a pretty good job of transferring over the data, but unfortunately it's not a straightforward case of upload a backup file and click a button.
In this article, I'm going to take you through the actual steps you need to take to migrate an account from cPanel to CWP
IMPORTANT: Do not create an account for your cPanel user in CWP yet !
You will create the CWP user as part of the migration process. Creating the account beforehand causes the migration to not work correctly. If you have already created the user account, you should go to User Accounts > List Accounts and delete that account.
1. Make a Checklist of Everything That Needs To Be Copied Over
Make a note of all of the elements in each of the following categories so you can confirm that everything has copied over as soon as you have finished.
- Contents of public_html
- databases
- database users
- email accounts
- email messages
- email rules and filters
- addon domains
- subdomains
- passwords (ftp accounts, email accounts, control panel)
2. Create a Master cPanel Backup
From your cPanel User account, select the 'Backup Wizard' (it's in the 'Files' section).
You'll be asked to choose between 'Backup' or 'Restore'. Select 'Backup'.
The next page gives you the option of 'Full Backup' or 'Partial Backup'. The Partial Backup options are:
- Home Directory
- MySQL Databases
- Email Forwarders & Filters
Select 'Full Backup'.
Next you will be asked to choose the destination for the backup. If you're familiar with using remote FTP or Secure Copy (SCP), feel free to use either of those methods - the file needs to be copied to the /home folder of your Centos server.. As this article is aimed at those individuals with less experience, I will be leaving this at the default setting of 'Home Directory'.
Enter your email if you want to be notified when the backup is ready, or select the radio button to indicate you don't want email notification.
Click 'Generate Backup'. Because I selected 'Home Directory', the backup will be saved in the folder 'home/user' of my cPanel account and the filename will take the form backup-{date}_{time}_user.tar.gz.
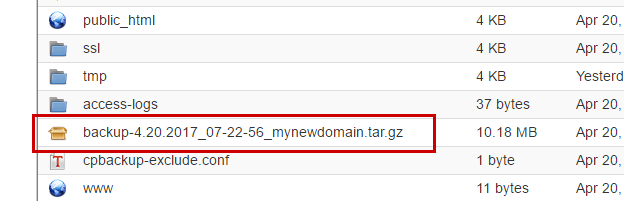
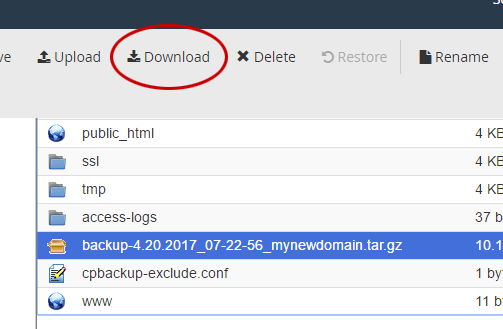
Using the cPanel filemanager, select the file, then click the download link and save it on your local computer. The file will be saved in your browsers default download folder
3. Upload the backup file to the /home folder of your Centos Web Panel.
It may be possible to upload the backup using the Centos Web Panel filemanager, but this is limited to small file sizes, so I'm going to use Filezilla to upload using SFTP.
This is not a straightforward process because
- the filepermissions on the /home folder are set to only allow write access by the owner of the folder
- the owner of the folder is 'root'.
- I've set the server to not allow direct login as 'root'.
So this is going to be a two step process:
Step 1
I've created a new user (using PuTTY) called 'ftp-upload' and this is the account I will be using to log in to with Filezilla.
An entry for this account needs to be set up in filezilla:
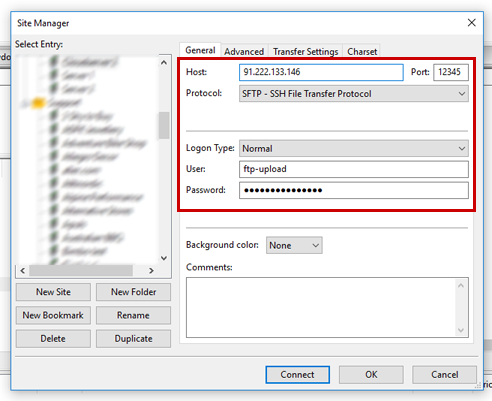
Make sure you set the protocol to 'SFTP - SSH File Transfer Protocol' then enter the IP address, port, user and password details.
Click 'Connect' and then upload the backup file from your 'download' folder.
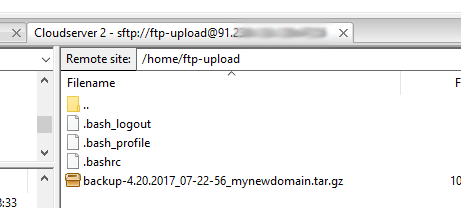
You can see that the file has been uploaded to the folder '/home/ftp-upload'.
Step 2.
Next we need to move the file to the '/home' directory, and for this we need to log in using PuTTY (or Terminal if you're on a Mac) as a user that has root privileges. I've given 'ftp-upload' these privileges, so I'll log in with those credentials.
Once logged in it's:
You will, of course, need to change the folder and filenames to match your own circumstances.
4. Restore The Backup.
In your Centos Web Panel, use the navigation menu on the left of the page to go to User Accounts > cPanel Migration.
You can ignore the part where it says that the file format must be cpmove-{USER}.tar.gz - the filename format backup-{date}_{time}_user.tar.gz works perfectly well as you can see below:
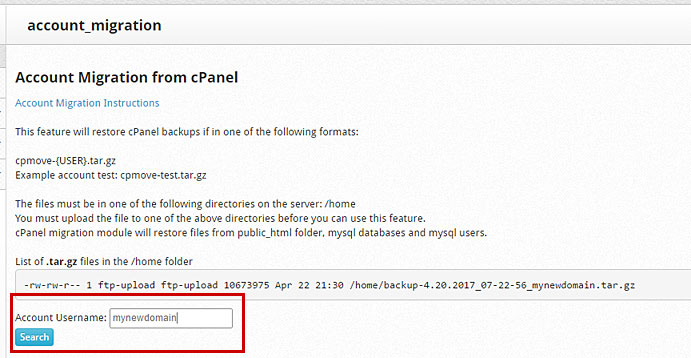
Enter the Account Username (this must be exactly the same as in the backup filename) and click the 'Search' button.
This then appears at the top of the page:

If there is more than one backup file for the account, select the one you want from the dropdown list and click 'Restore'
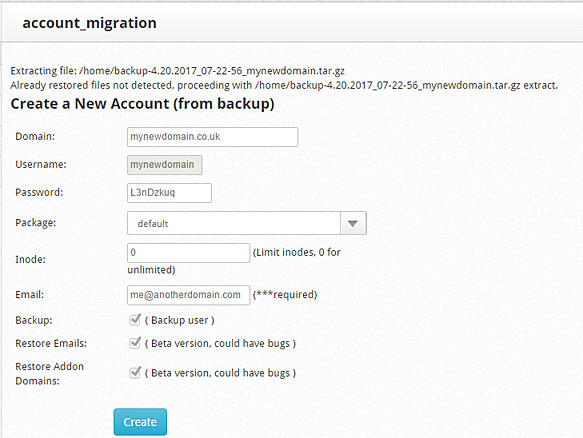
Make a note of, or change the Password, enter an email address and ensure that Restore Emails and Restore Addon Domains are checked then click 'Create'.
5. Change Your Domain's Nameservers
Now that everything has been transferred over, it is time to update the nameserver information held by your domain registrar (GoDaddy, 1and1 etc.).
Log into your account at your domain registrar, find the section for managing your domain and choose the option to 'Modify or Change DNS Settings'. Set the nameservers to point to the correct ones for your CW Panel server.
Remember also, that it may take up to 48 hours for the new nameservers to 'propagate' fully across the domain network, so you may have to wait a little while before moving to step 6. Time for a cup of tea (or a beer) methinks!
6. Start Checking Everything Works
Step 1. Make Sure Your Domain is Being Routed To Your Client Centos Web Panel
Browse to yourdomain.com:2030. If you get the Centos Web Panel login page, then it is, and you can start checking everything is working correctly.
Step 2. Fix File Permissions.
Log in to your main admin CW Panel (the WHM equivalent as opposed to the client one highlighted above) and click on User Accounts > Fix Permissions. Select the user account and then click the button. This updates all the file and folder permissions / ownership.
Step 3. Make Sure The Main Website Works
Browse to yourdomain.com. If you get the HTTP Test Page, then either delete or rename the file 'index.html' and check that the webpages look as they should.
Step 4. Check Email Works.
From your Client Web Panel's dashboard, click the link to 'List Email Accounts'. Check all of the accounts are correctly installed. Change the passwords if necessary.
Click the link for 'Roundcube Webmail' or use the navigation system on the left of the page and go to Email > Roundcube Webmail and login using email address and password (don't forget that CWP created a new password for emails when migrating the account - although you can always change the password via Email > List Email Accounts). Make sure you can send and receive emails.
Step 5. Check Databases and Database Users.
From your Client Web Panel's dashboard, click the link to 'MySQL Manager. Check all of the databases have been installed and that they have the correct user associated with them.
CWP does not currently have a database user manager like cPanel. You can either add or delete users. There is no option to change a users password.
Step 6. Check Addon Domains and Subdomains.
The cPanel Migration tool does not appear to be functioning correctly as I write this - Addon Domains and Subdomains are not currently being copied over. But this is more of a minor inconvenience as opposed to a major problem - they are easy enough to set up using Domains > Add Domains or Domains > Add Subdomain from the main navigation on the left hand side of the Control Panel.
Step 7. Create Any FTP Accounts You Need.
You only need to do this if you want to create an FTP account that limits the areas within the account that certain users can access. Otherwise use the account domain, username and password with your FTP client (eg. Filezilla) and access to all areas of the user account will be available.
7. Remove cPanel Backup and Folder Created From Backup
Once everything is working as it should, the final piece of housekeeping is to delete the cPanel backup file and the folder that has been created in the '/home' directory.
Using PuTTY (or Terminal for Mac users), log in to your server using an account with root privileges. To delete the backup file enter
to take you to the '/home' directory. Then
to list all of the files and folders in the '/home directory. Use this list to copy the name of the file and folder to delete.
To delete the backup file it's (for example)
then:
The '-R' tells the shell to delete (remove) all of the files and folders recursively.
And that's it ! You have successfully migrated a cPanel account to Centos Web Panel.
Related Articles
How To Use PuTTY to Access Your Server Using SSH

Posted by: The Curious Website Designer
on Mon 20 Mar 2017
If you have never used SSH to access your VPS, you will probably never have come across PuTTY. This article will put that situation right.
How To Install Centos Web Panel (CWP) On A Centos 7 Server
 On A Centos 7 Server")
Posted by: The Curious Website Designer
on Thu 30 Mar 2017
This is the third in a series of 4 articles aimed at server administrators who have very limited experience. In this article, I will explain how to install CWP on server with Centos 7. The final article will focus on initial configuration of the Web Panel
Tags: newbie, server, vps, vps server, security, server security, security measures, Centos7, Centos 7